Wondering how to change your skin on Minecraft ? It’s an extremely simple thing. If you are old on the game, you don’t even need to go through the official website anymore and everything can be done with the launcher.
How to change your Minecraft skin
Steps to follow to change your Minecraft skin from the launcher
Total Time: 2 minutes
-
Open your launcher and go to the “Skins” tab.
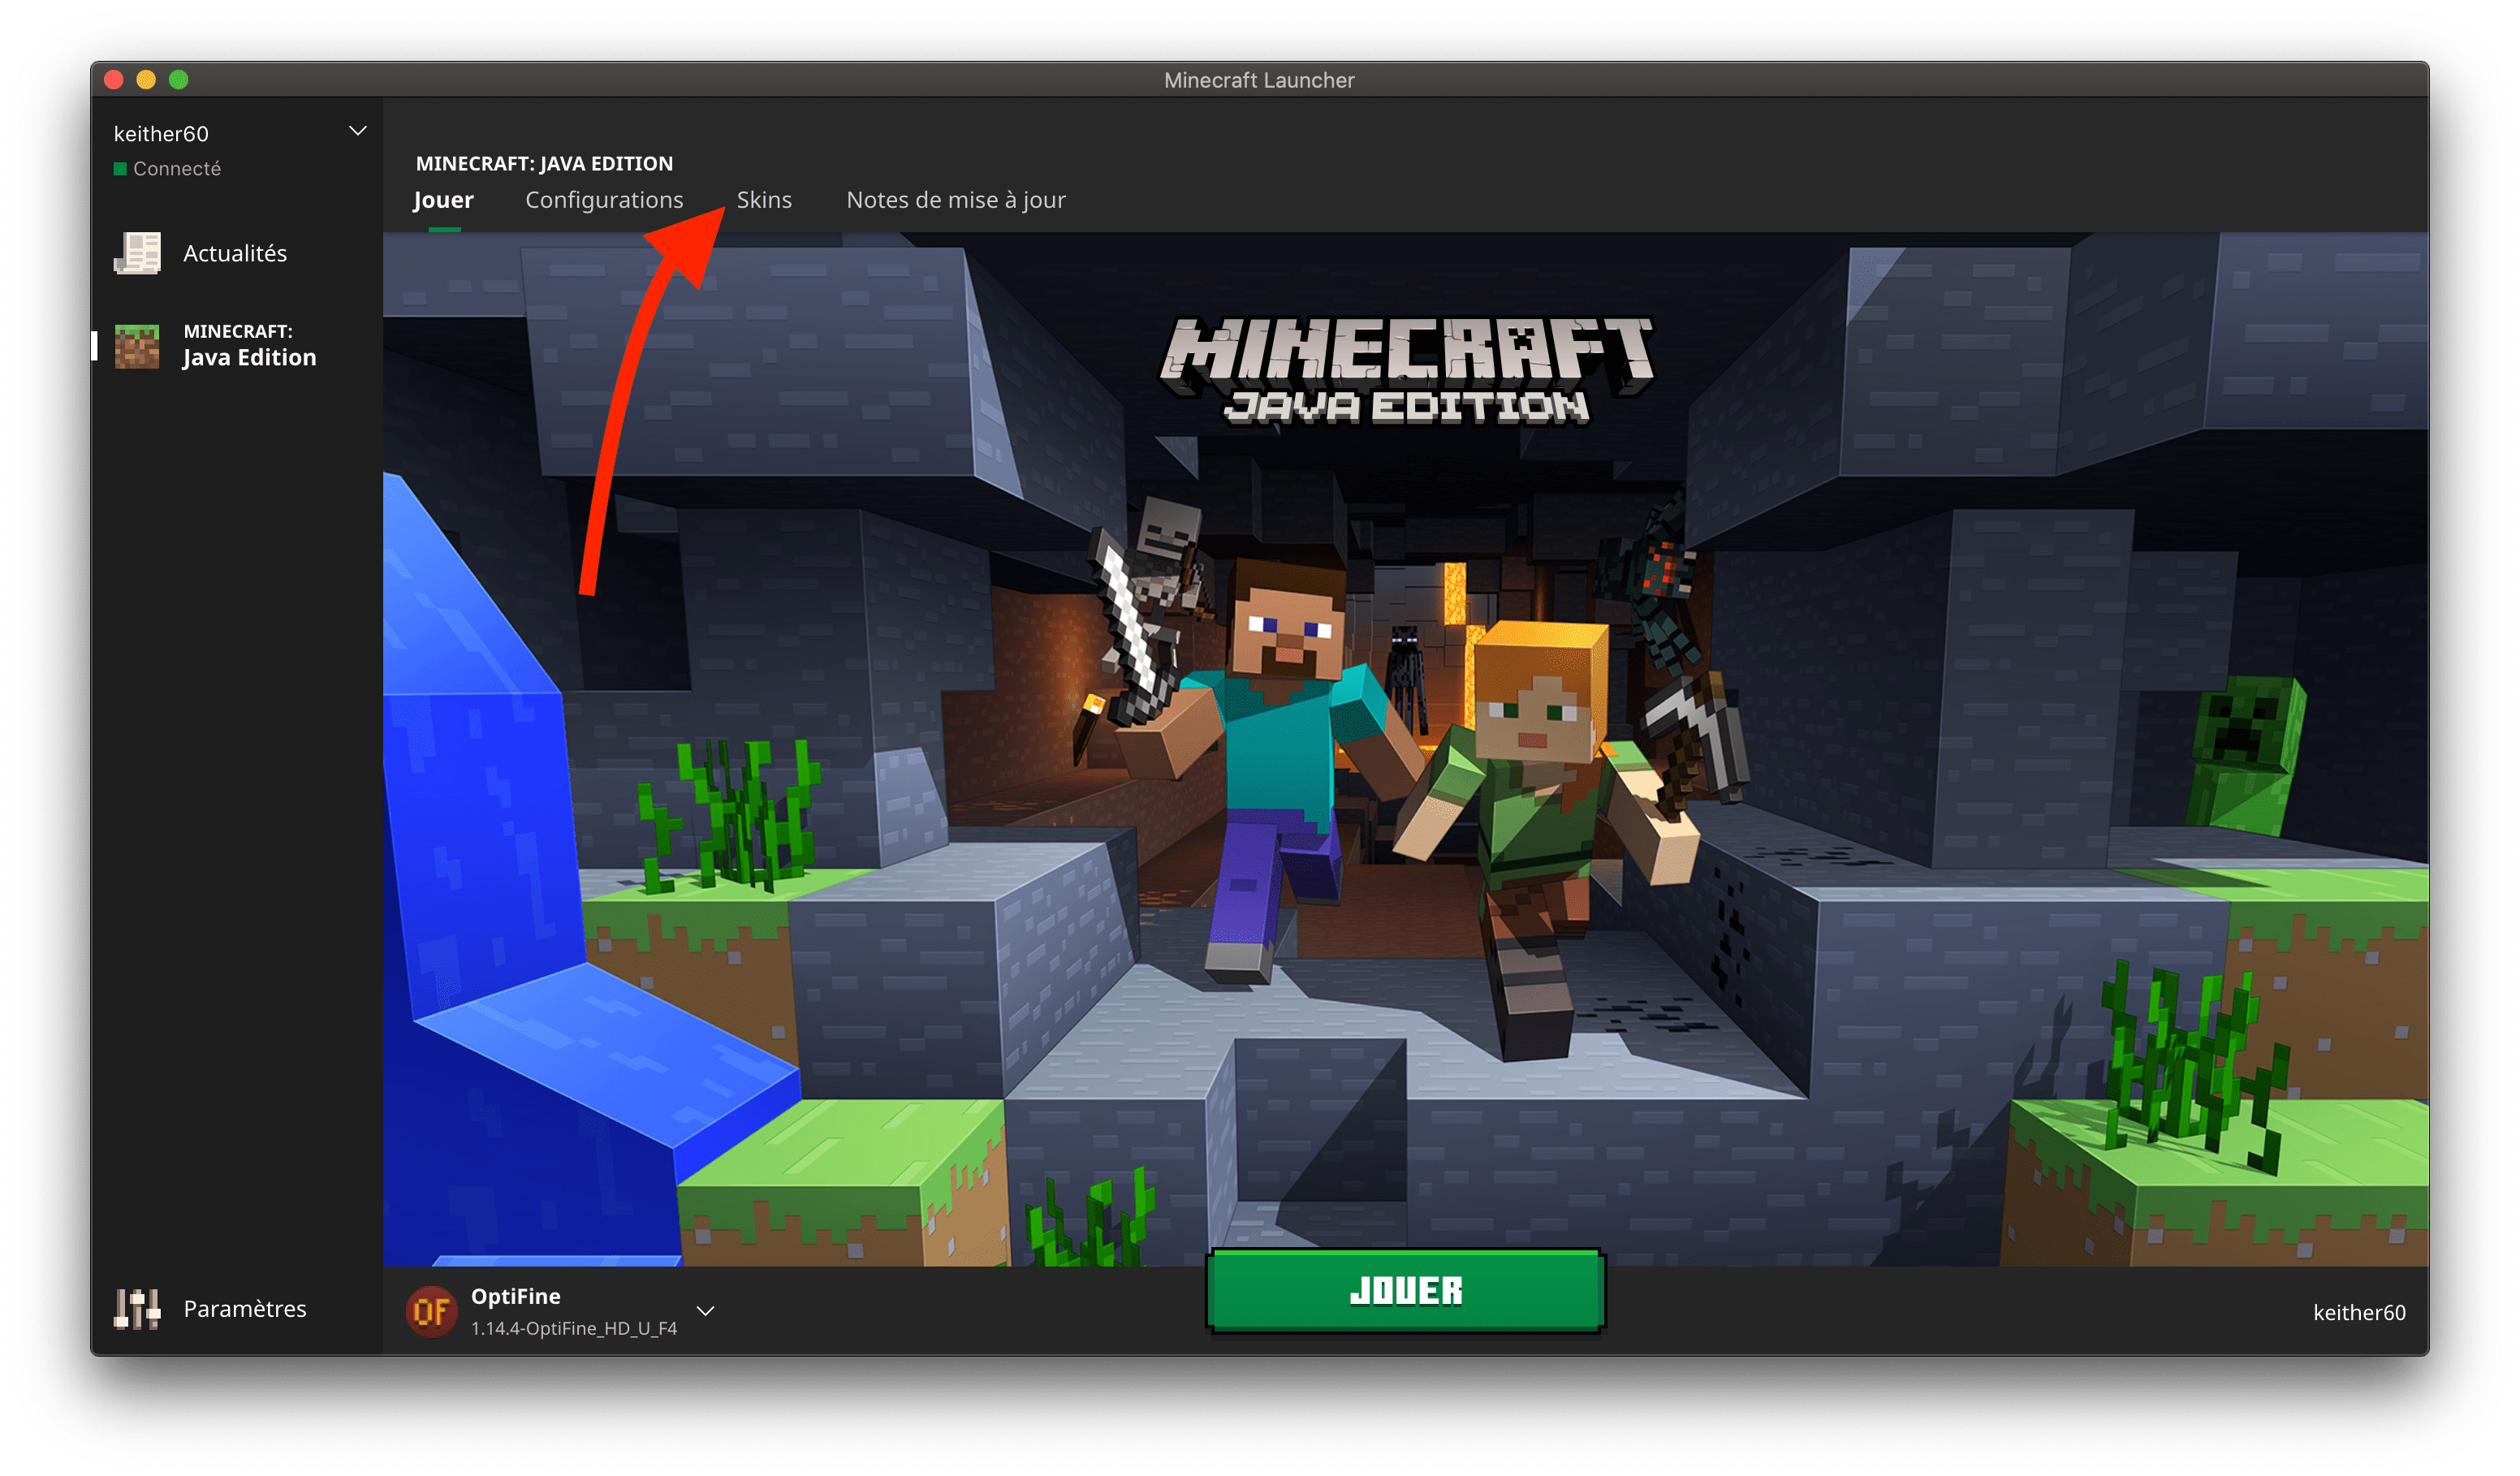
It’s at the top of the menu
-
Click on the “New Skin” button.
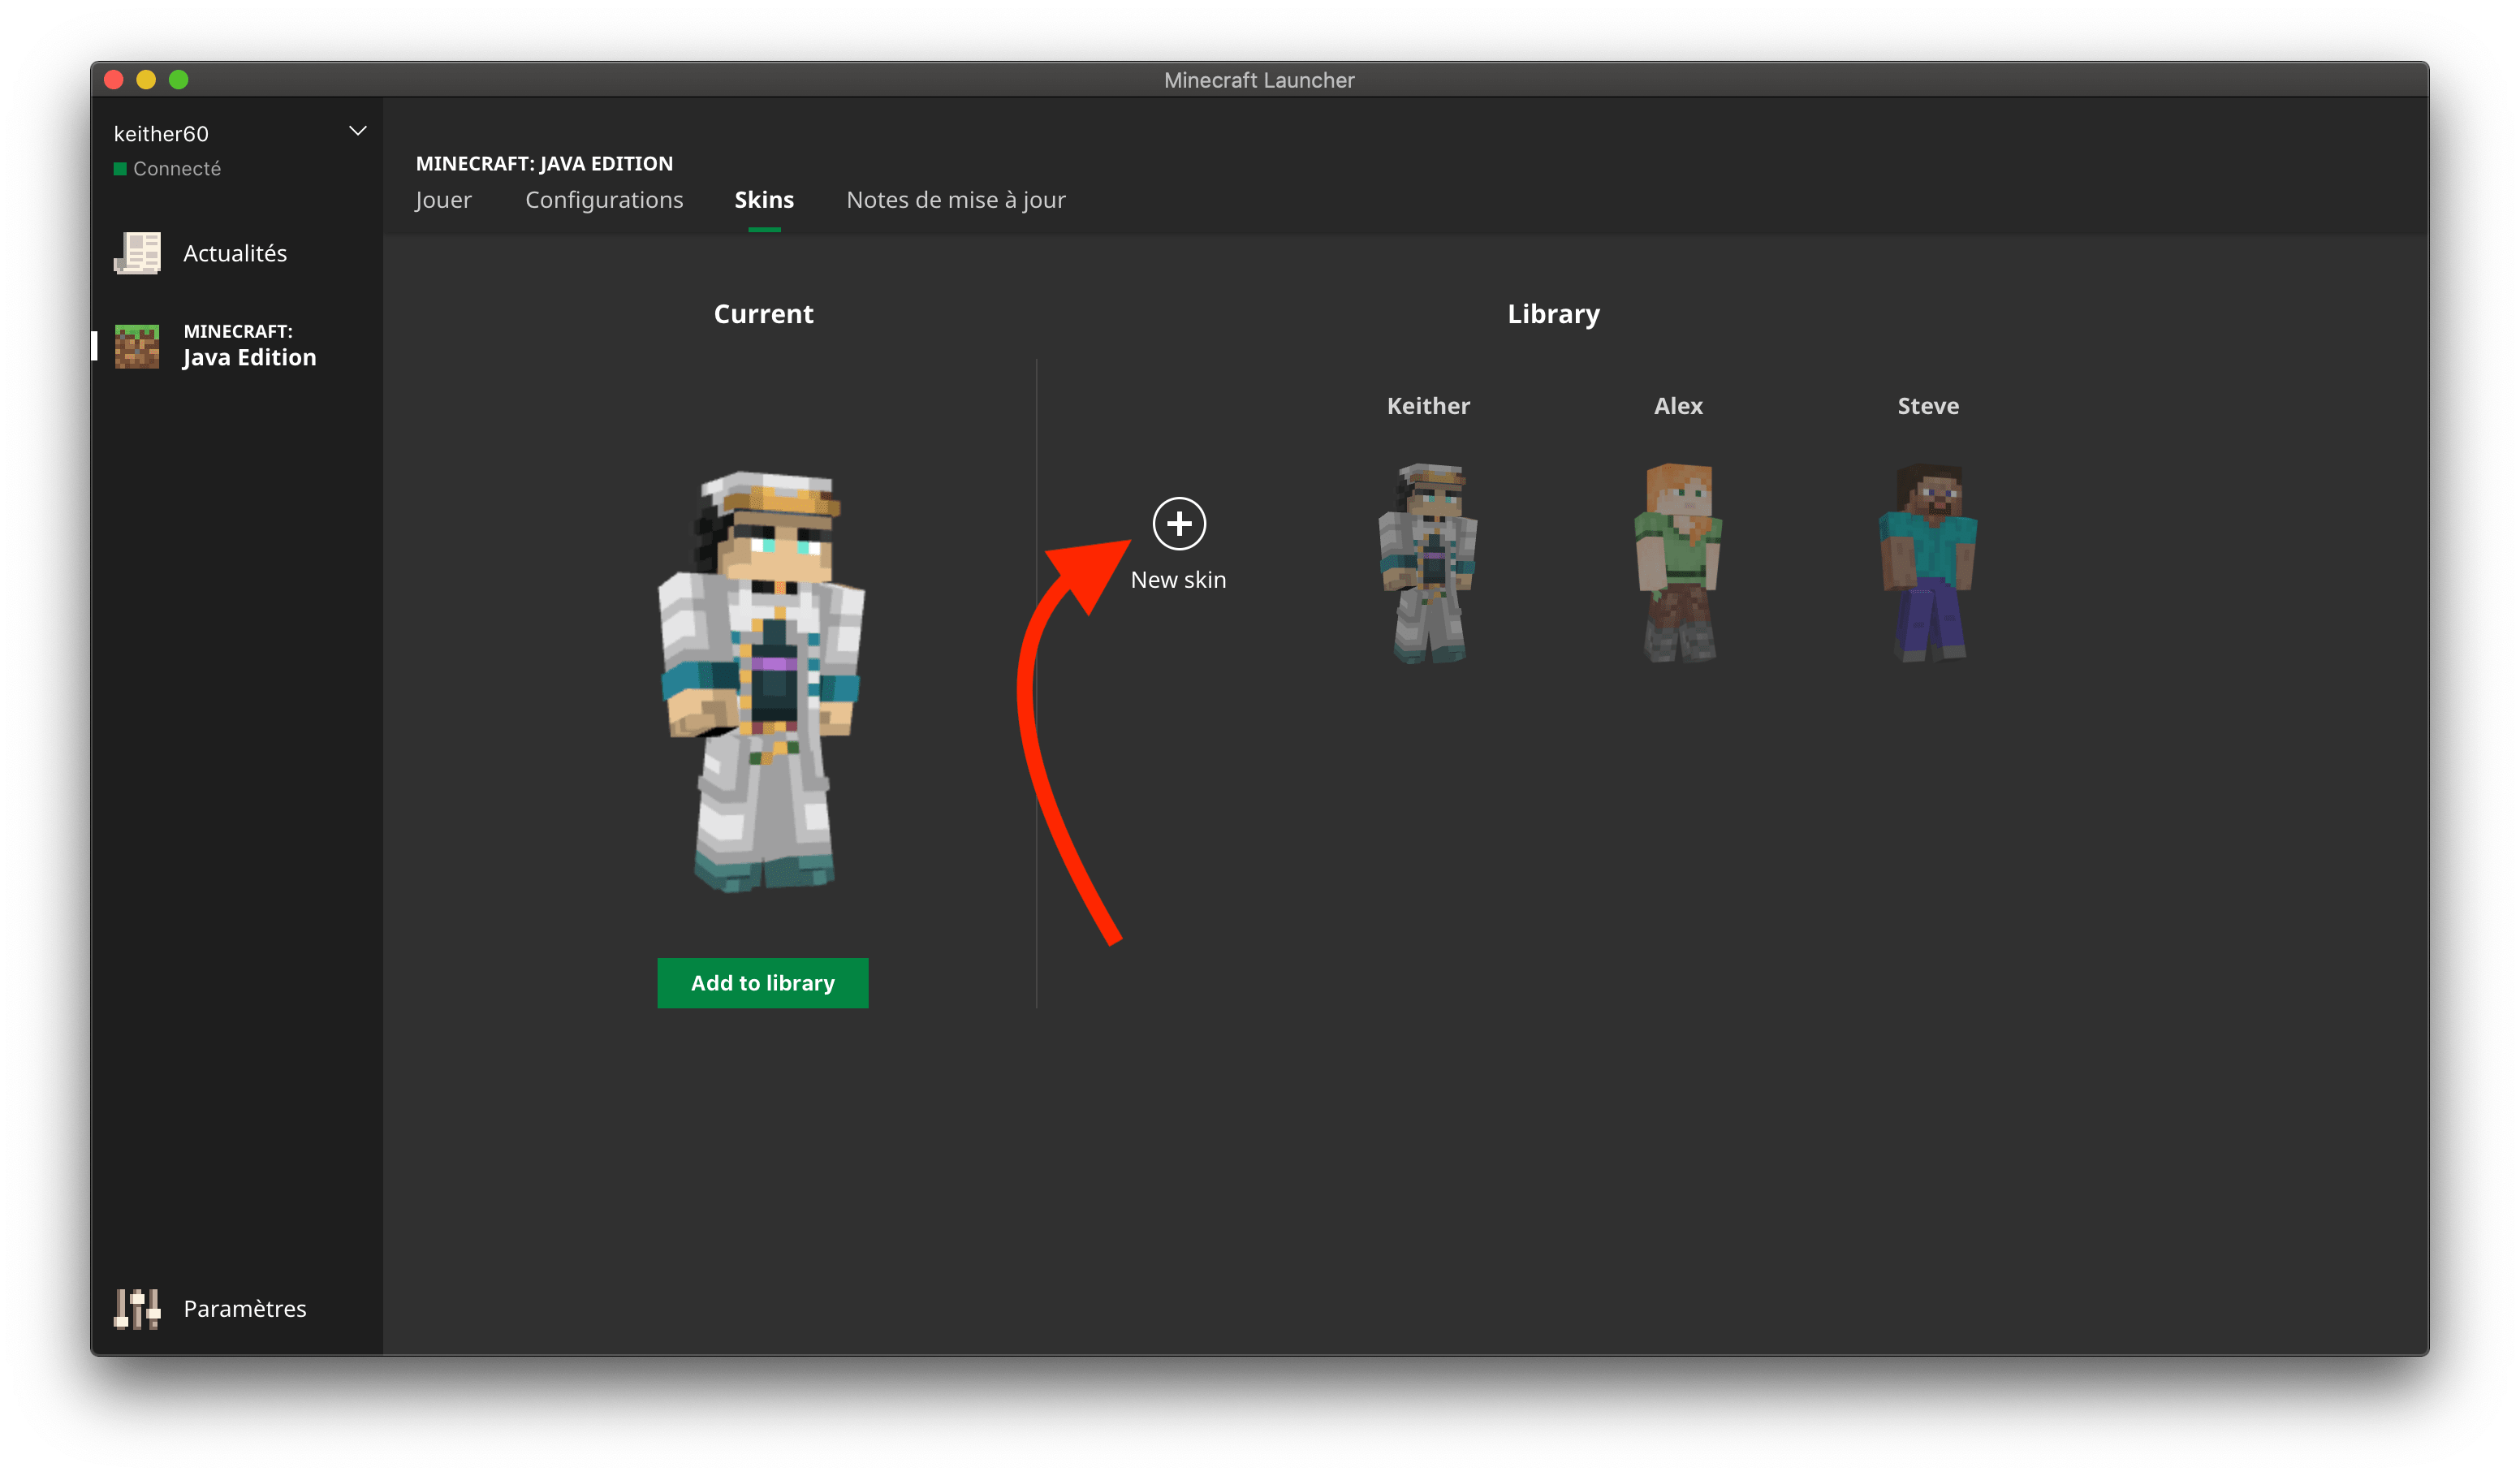
If you already have skins you will see them here
-
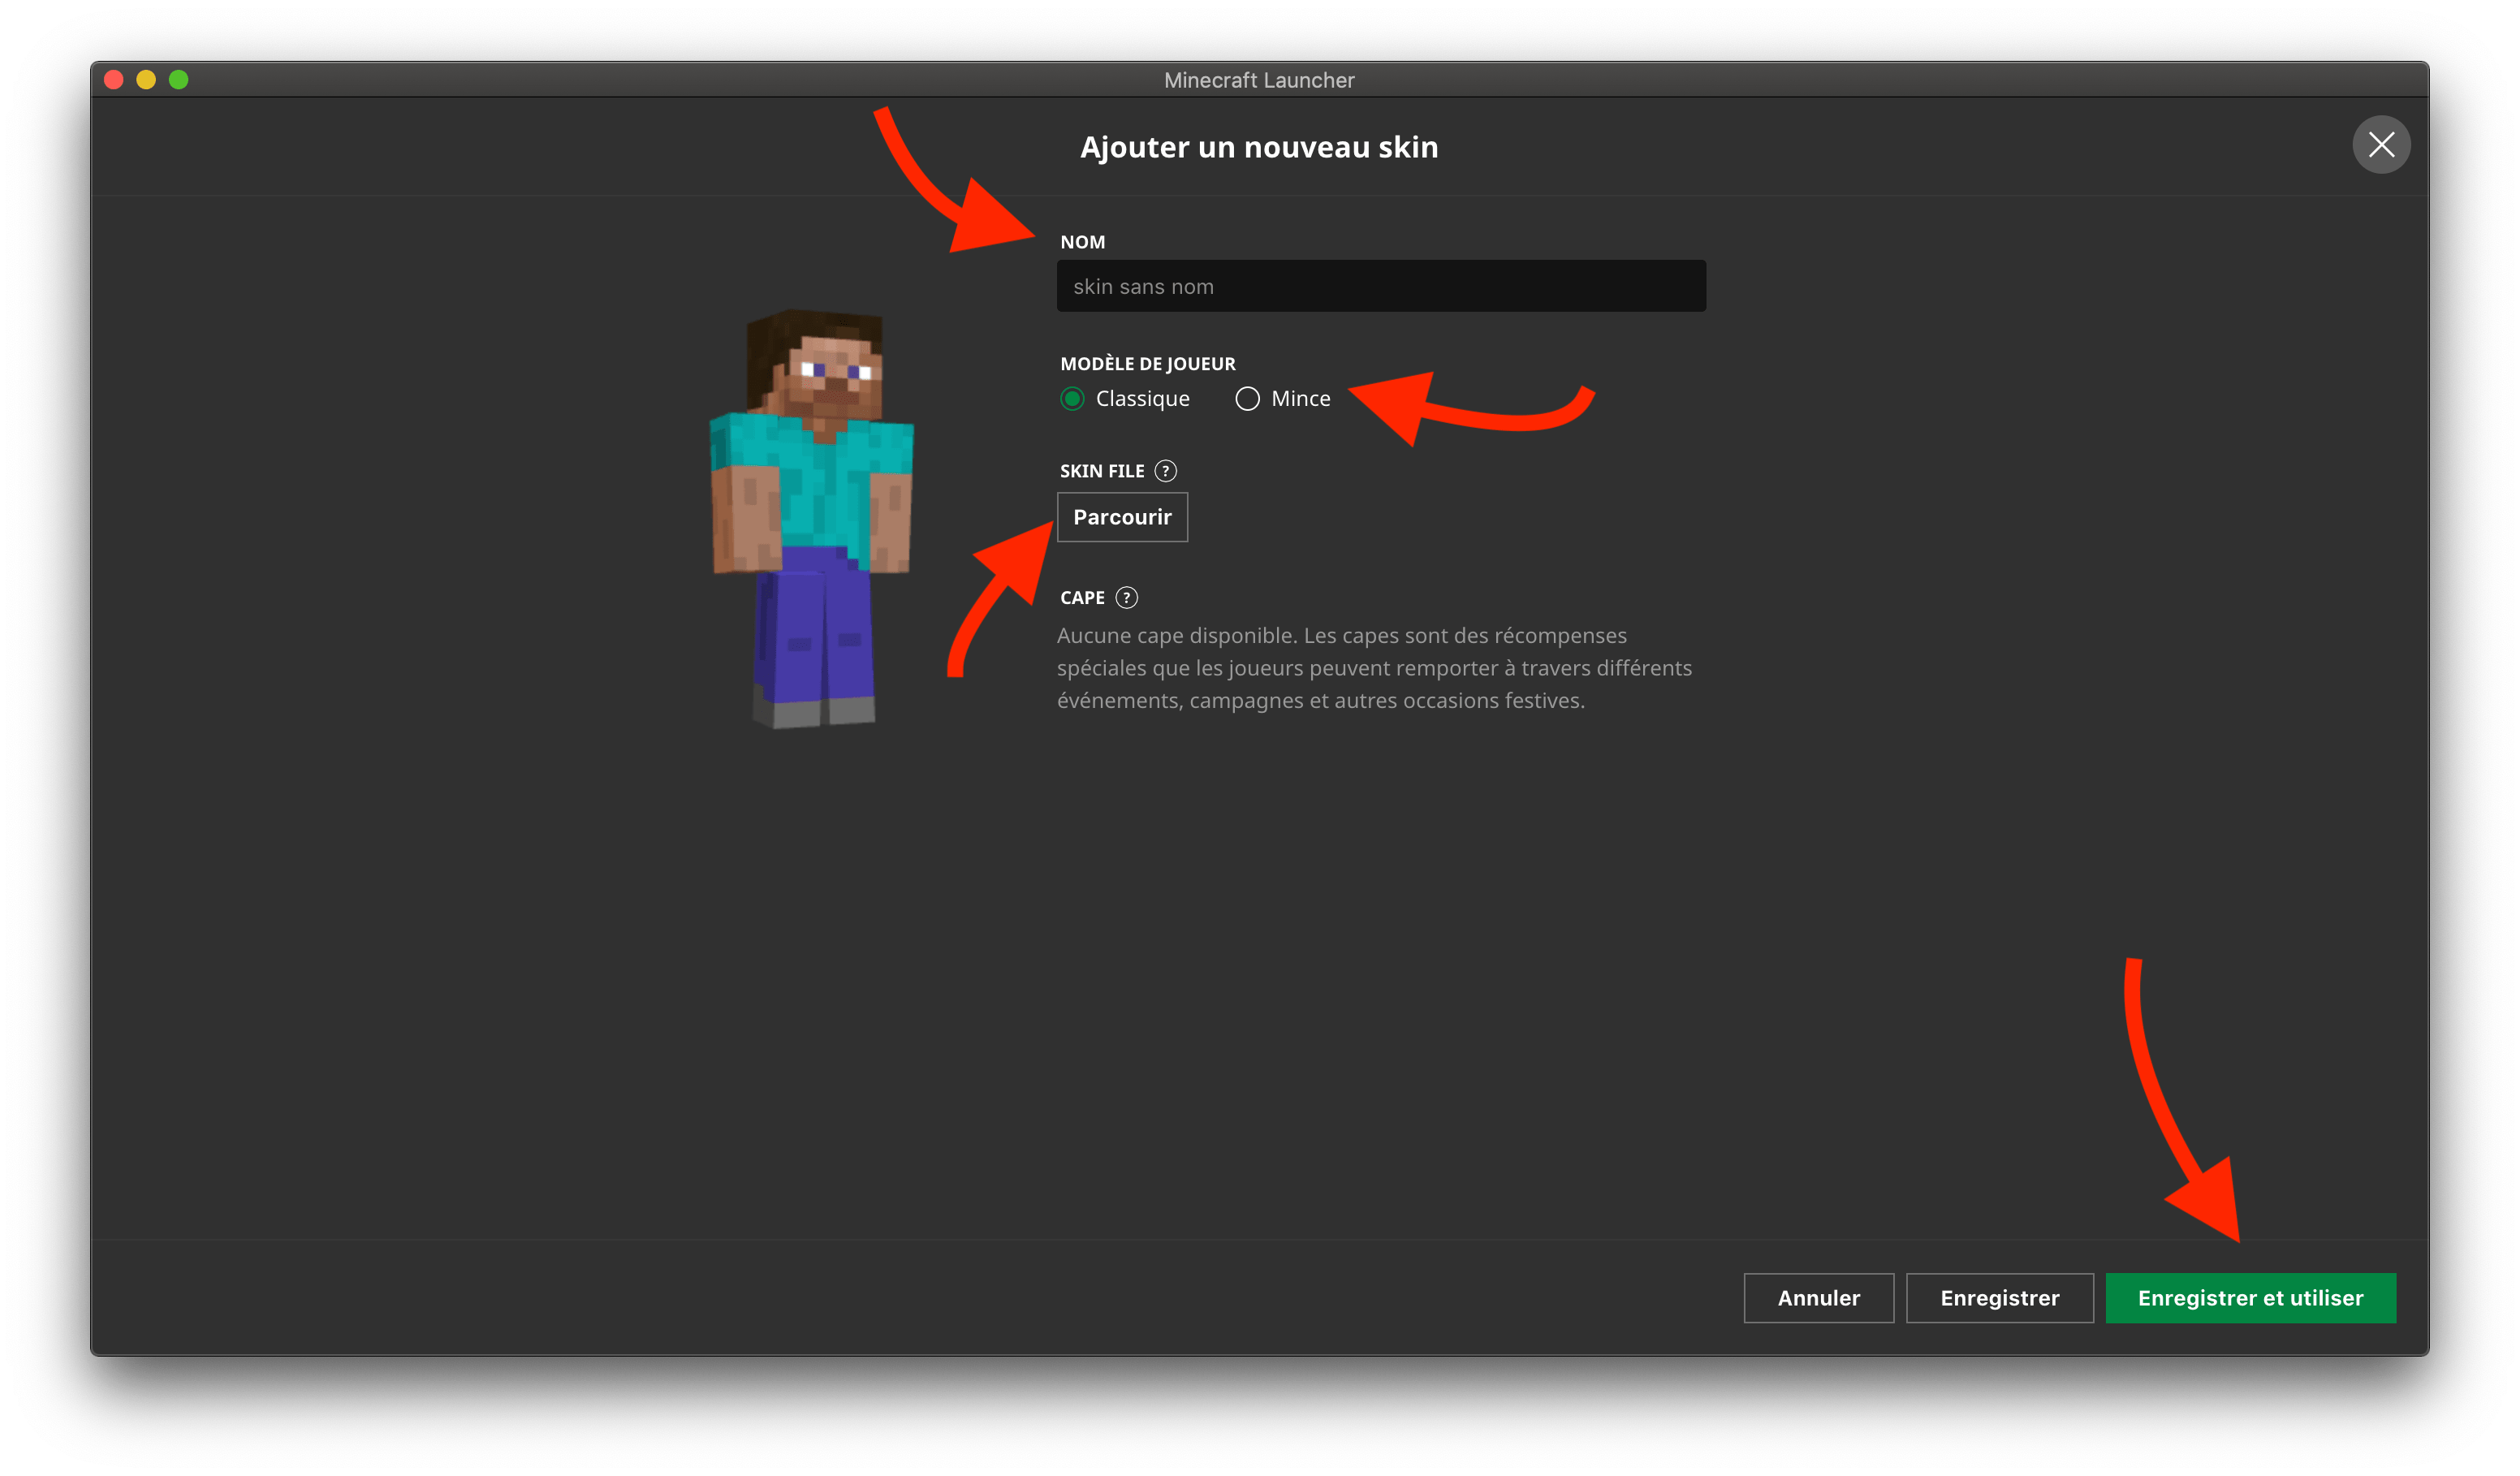
From here you can name the skin in “Name”, apply the “Classic” or “Slim” style to it, and upload the png file of the previously downloaded skin by clicking on “Browse”.
Once your skin has been sent, click on “Save and use”.
-
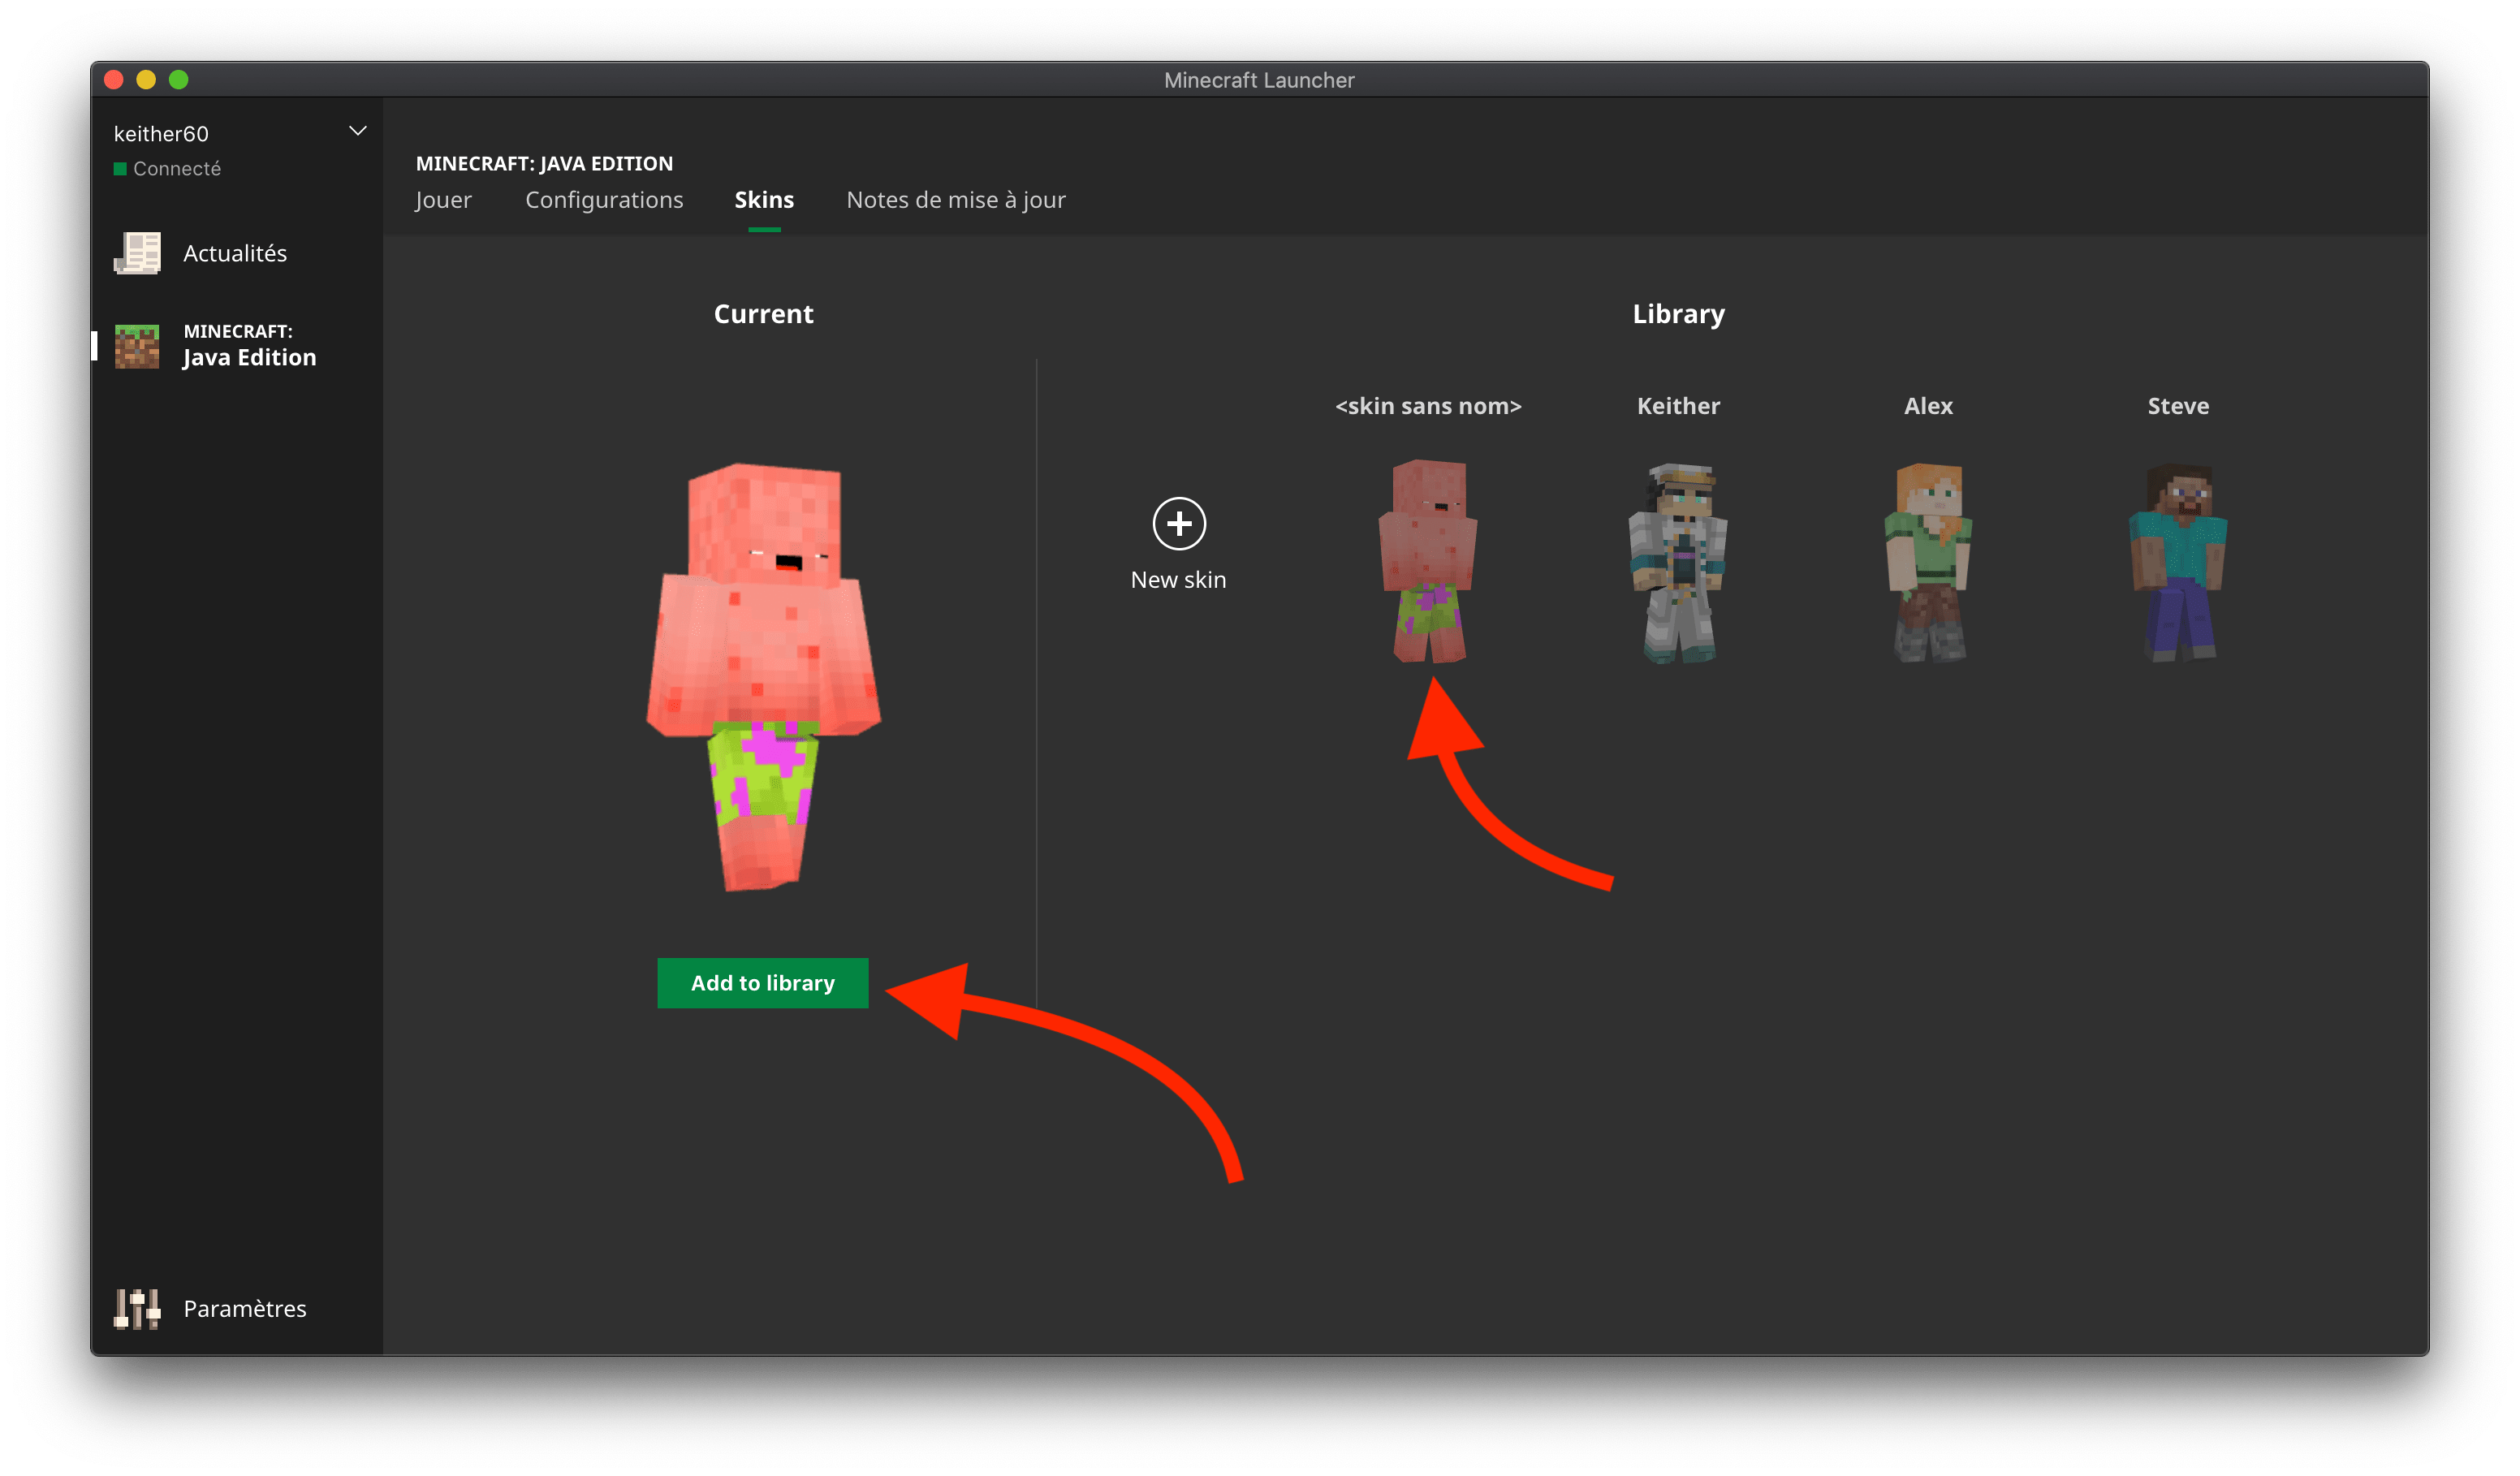
Your skin is now available in the list.
You can save it in your library to reuse it even if you change it later by clicking on “add to library”.
