Basically, Mojang decided to allocate only 2 GB of RAM to Minecraft with the new launcher. If you only play in vanilla, you won’t have any RAM problems. However, if you start installing a lot of mods, HD texture packs, or even greedy shaders, you may quickly reach the allocated limit. Most of the time this will result in a crash of your game.
But don’t worry! There’s a simple trick to increase the amount of RAM allocated to Minecraft. We’ll help you do it.
Table of Contents
Allocate more RAM to Minecraft with the launcher
Thanks to the new launcher you can dedicate more RAM to Minecraft in just a few clicks. Just follow these steps :
Allocate more RAM to Minecraft.
Total Time: 2 minutes
-
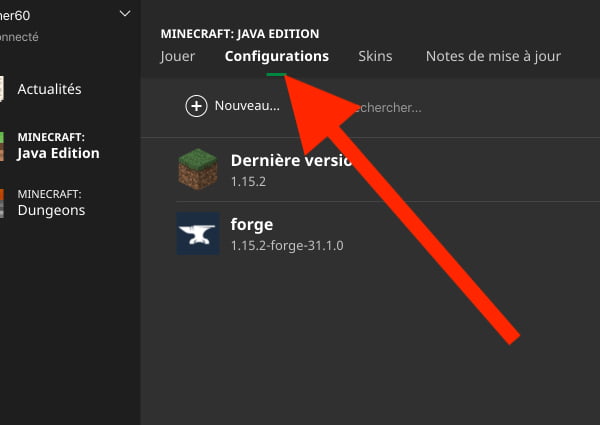
Launch the Minecraft launcher and go to the “Settings” tab.
This is the second tab below “Minecraft: Java Edition”.
-
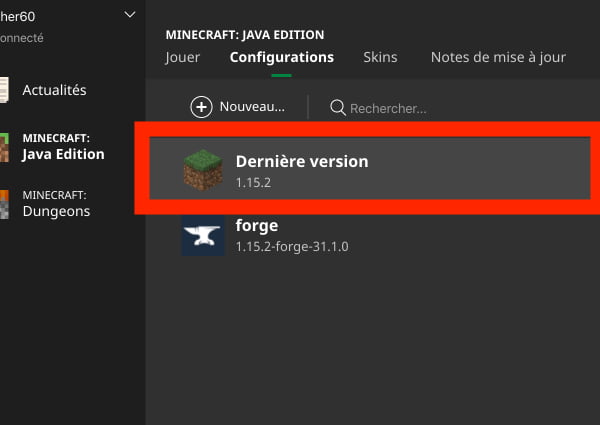
Select the profile on which you want to increase the RAM allocated to Minecraft.
You can repeat the action for each desired Minecraft profile.
-
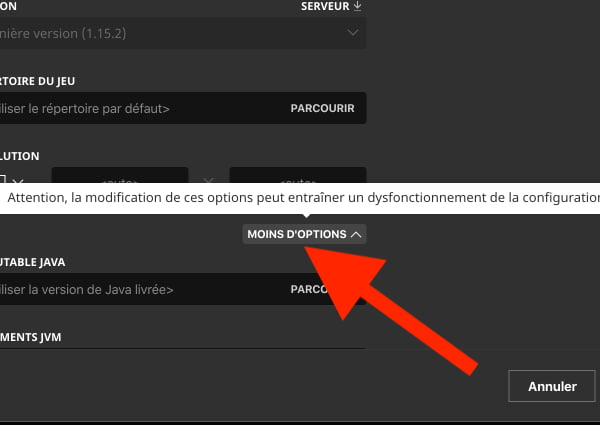
Click on “More Options” located at the bottom right of the screen.
An alert will tell you that changing the options may cause the selected Minecraft configuration to malfunction.
-
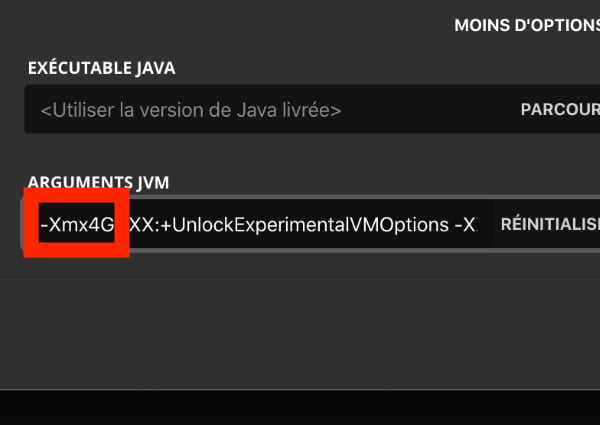
Change the text in the ARGUMENTS JVM part ” -Xmx2G ” to ” -Xmx4G “, so you will increase the allocated RAM from 2 GB to 4 GB.
Do not allocate more memory to Minecraft than your PC has.
-
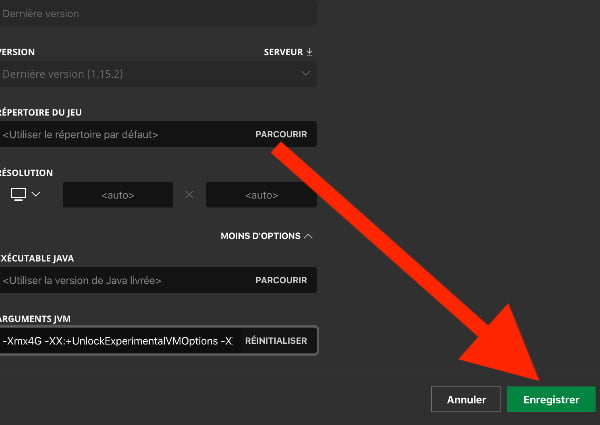
Click “Save”.
You can now launch Minecraft with the modified profile, you have managed to allocate more ram to Minecraft !
Allocate more RAM to Minecraft with the Twitch launcher
In case you are using modpacks, chances are that you will need to increase the RAM allocated to them by your computer in Minecraft. We assume that you have already downloaded the Twitch launcher and that a modpack is already downloaded and installed.
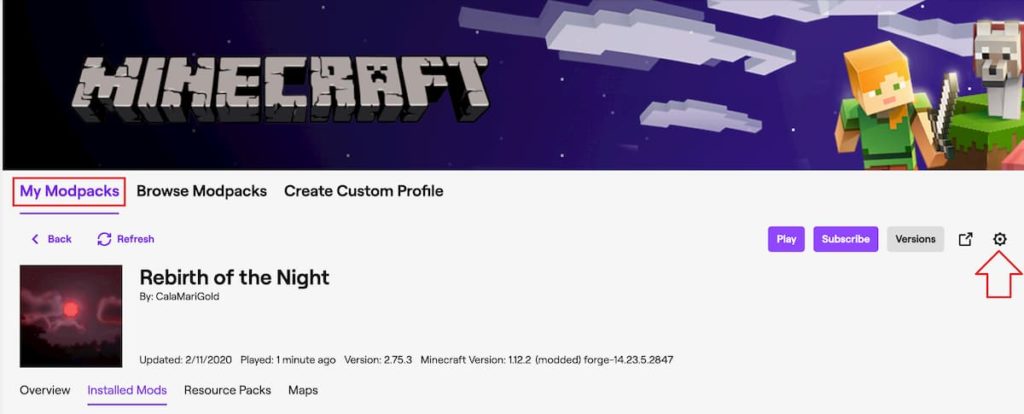
- Click on the modpack profile
- Go to the menu via the gear at the top right of the menu.
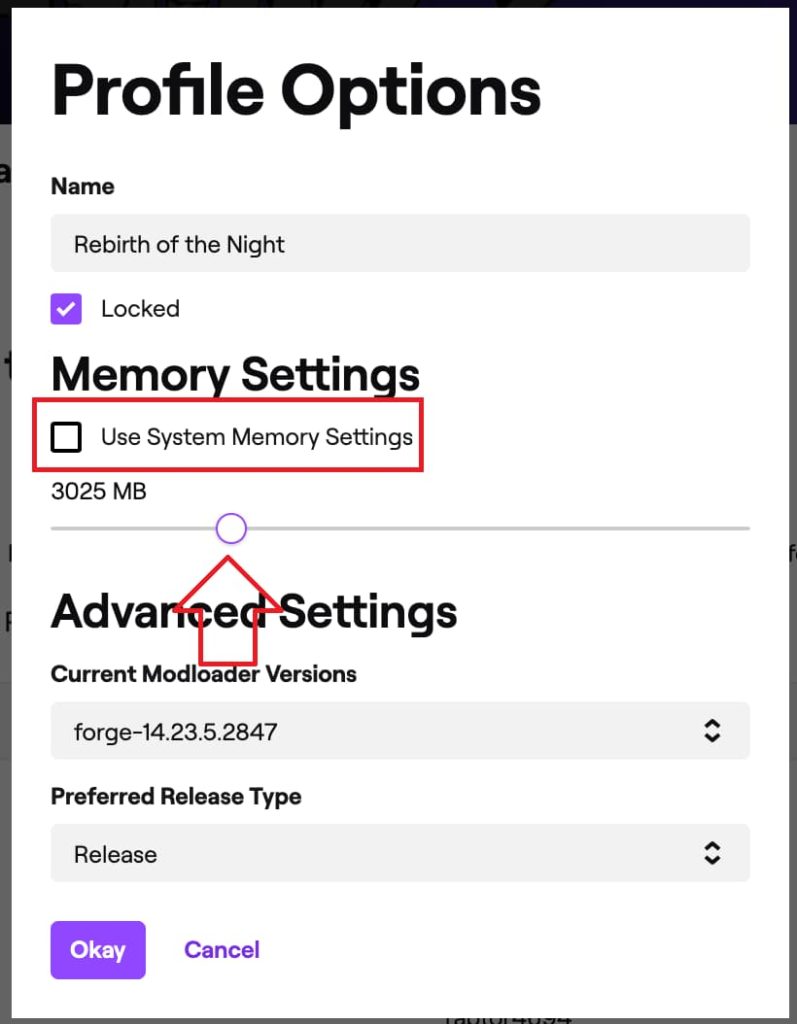
- A dropdown list opens, choose Profile option
- In memory settings, be sure to uncheck “Use system memory settings”.
- From here, note the value in Mb that you want to allocate to Minecraft (3000Mb = 3 GB)
- Click OK and start the game
How much RAM can you allocate ?
You will need to determine the maximum amount of RAM you can allocate to Minecraft based on your computer’s capabilities.
RAM available on PC
Press the WINDOWS and PAUSE keys simultaneously. A window will open in which you will be able to see how much RAM you have available. Here it is 8 GB :
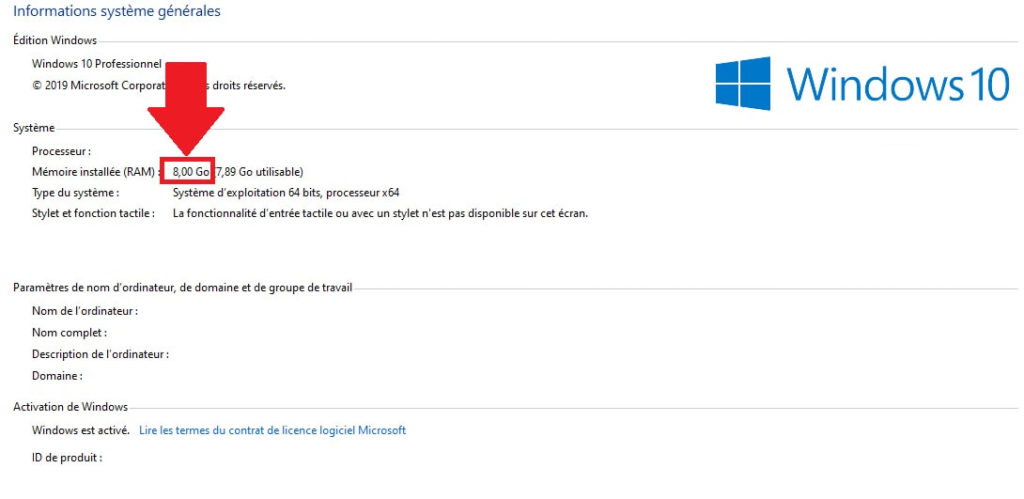
RAM available on Mac
Click on the apple-shaped Apple logo at the top left of your screen and then click “About this Mac” . Take a look at “Memory”, this is where you’ll find out how much RAM is available on your Mac.
How much RAM do I need to allocate to Minecraft ?
Now that you know how much RAM your computer has, you don’t need to worry about allocating more to Minecraft.
The minimum recommendation required per Mojang is 2 GB of RAM, that’s all you need to run the game. However, these minimum requirements are generally a bit optimistic. If you use mods you can go up to 4 GB of memory, or even 8 if you see that it’s not enough.
If it still doesn’t work, try using Optifine.
